

Welcome to the April 2024 Edition of the Global Stamping Friends Blog Hop! You'll see projects in our hop from Stampin' Up! demonstrators around the world--I'm in Colorado Springs, Colorado. (Note: I can only sell to customers in the US, so any prices mentioned are in USD)
We generally hop the first Friday of each month, and our theme for today is A Fond Farewell! We'll be featuring Retiring Items from our Last Chance Lists today, and I'm sharing a project that uses the Just My Type (my apologies, this seems to be sold out already!), and the Rays of Light, stamp sets. {you can find all Product Purchase Links below the Blog Roll near the bottom of the post}

There are only 2 of us on the hop today...and I'm not feeling really great myself, so I will probably just leave you with the supplies for now.
Stampin' Supplies: Just My Type Stamp Set, Rays of Light Stamp Set, Daffodil Delight Ink Pad, Memento Tuxedo Black Ink Pad, Basic White Cardstock, Coastal Cabana Cardstock, Lighter than Air 6"x6" DSP, Iridescent Pastel Gems, Watercolor Pencil Assortment #2, Multipurpose Liquid Glue, Mini Stampin' Dimensionals, Simply Shammy (to clean photopolymer stamps), Stampin' Mist & Stampin' Scrub (to clean red rubber stamps), Paper Snips, Bone Folder, Stampin' Trimmer, Grid Paper. And don't forget Medium Basic White Envelopes for mailing!
Click the Next arrow below to see more creations with this month's theme!
(or check out the Blog Roll below the arrow for navigation)
(or check out the Blog Roll below the arrow for navigation)

Global Stamping Friends Blog Hop MARCH 2024 Blog Roll
1. Kimberley Morris YOU ARE HERE!
2. Tricia Butts
1. Kimberley Morris YOU ARE HERE!
2. Tricia Butts
")


 Designer Series Paper")


View or Download PDF of CURRENT Product Catalogs:
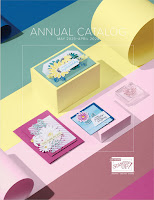 |
| 2023 (May) - 2024 (April) ANNUAL CATALOG |
 |
| 2024 Jan-April MINI CATALOG |
(if your order total in My Online Store equals or exceeds $150, please do NOT use my Monthly Perks Host Code...you will have earned Stampin' Rewards of your own!)
Get your Stampin' Supplies in my ONLINE STORE, and Be sure to check out these Deals:
CLEARANCE RACK (Up to 60% OFF Retired Product)
BUNDLE & SAVE!!! (Product Bundles at 10% OFF Everyday!)
BEGINNER STAMPER?? (Click the link and Choose a Category to BEGIN!)
CLEARANCE RACK (Up to 60% OFF Retired Product)
BUNDLE & SAVE!!! (Product Bundles at 10% OFF Everyday!)
BEGINNER STAMPER?? (Click the link and Choose a Category to BEGIN!)
~Kimberley Morris Colorado Springs, CO
Stampin' Up! Independent Demonstrator since 1994
procrastistamper@gmail.com
http://kimberley.stampinup.net (SHOP ONLINE 24/7!)
BECOME A DEMONSTRATOR
SIGN UP to get my Customer MEWSletter
Connect with me on FACEBOOK
Connect with me on PINTEREST
Connect with me on INSTAGRAM
Connect with me on TWITTER
SUBSCRIBE to my Blog via EMAIL


")
")


